
A Custom Push Pin Board That’s As Pretty As It Is Functional
In case you’re new here — first, hi! I’m so glad you found this page.
I originally started sharing here as a love letter to curating spaces, crafts, and moments that spark imagination. Through this new venture, I was recently hired to design an entire home (still a complete pinch-me moment). It’s something I never actively pursued, somehow it found me, and truthfully, it still doesn’t fully feel quite real. But wow, I am incredibly grateful to be living inside this dream.
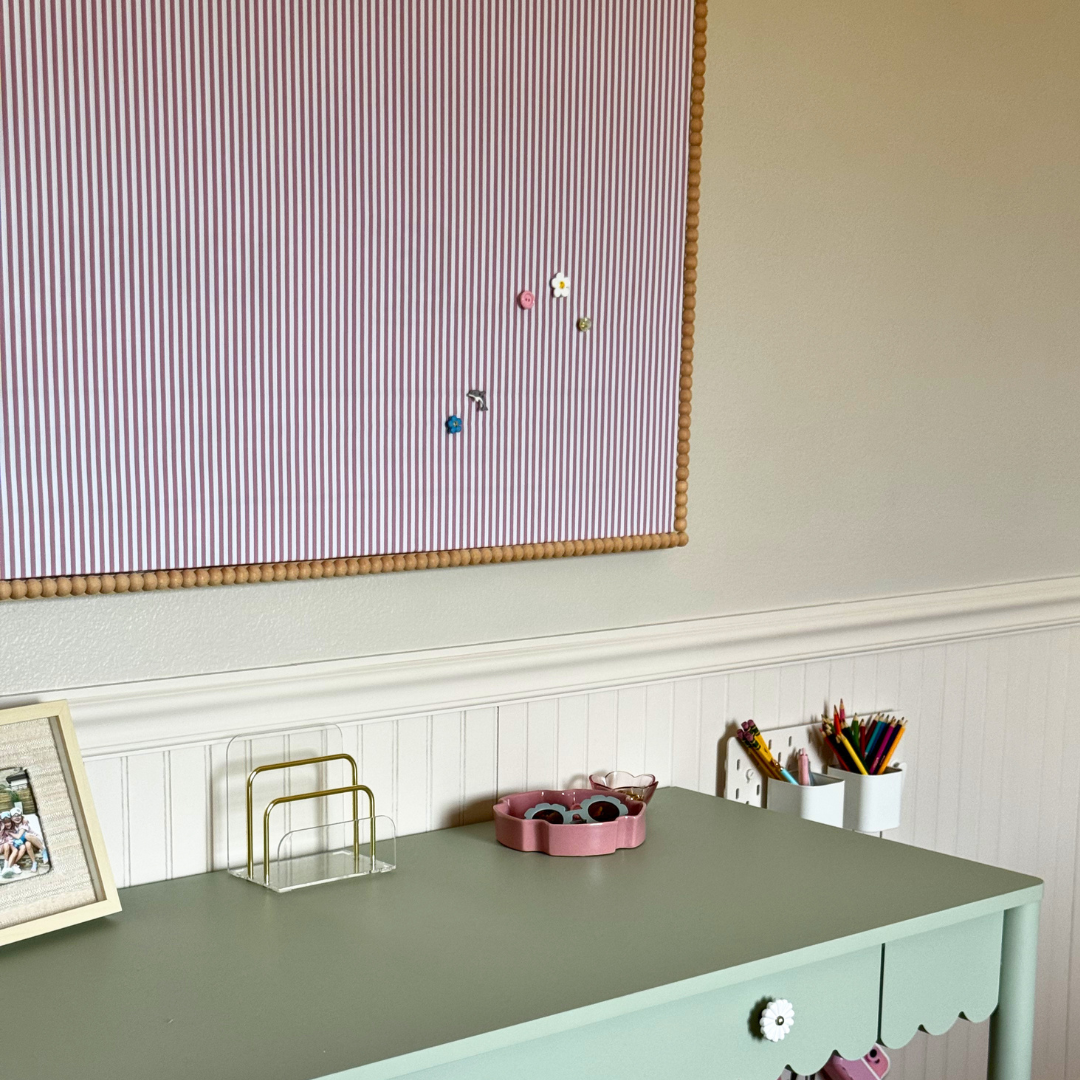
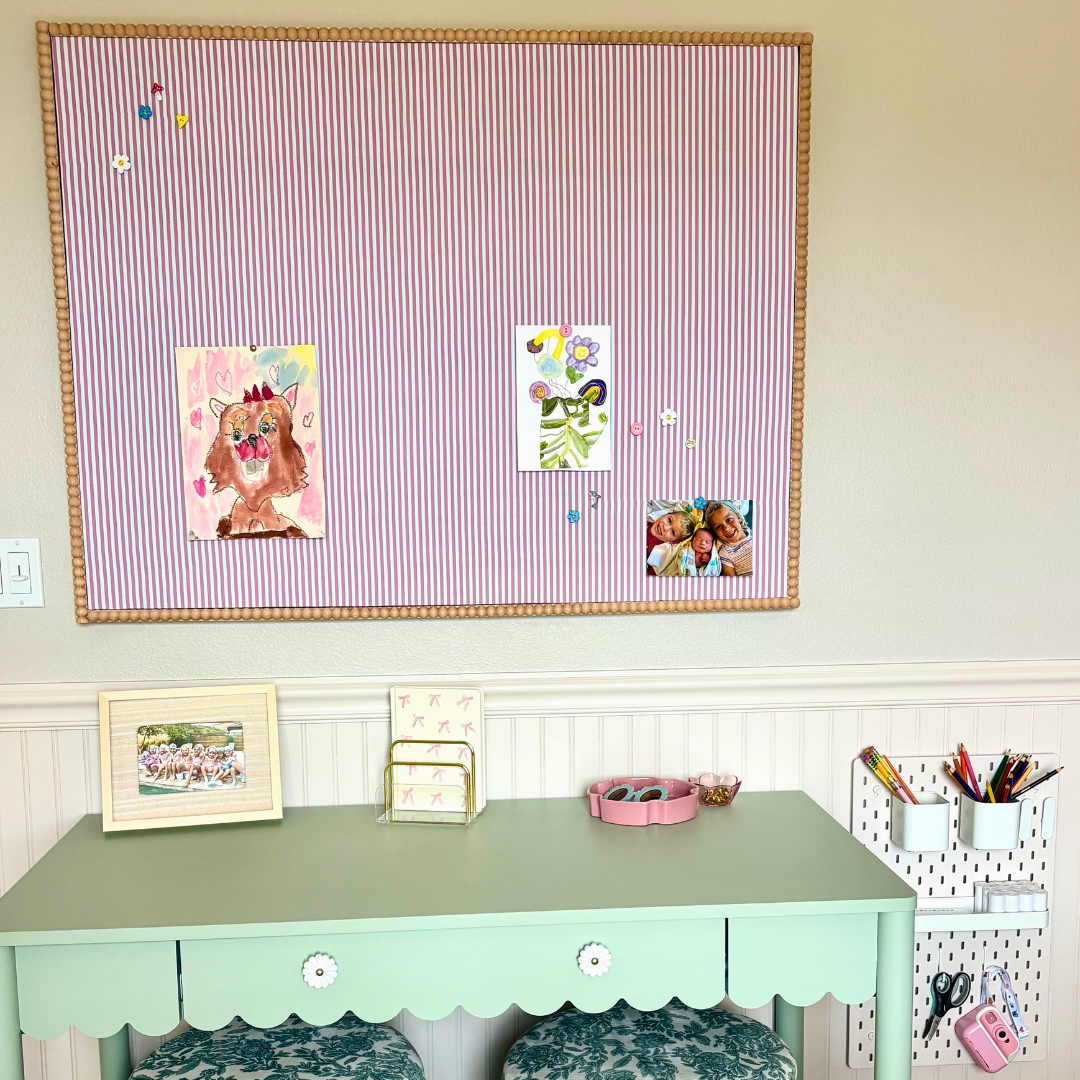
The first room I was asked to design belonged to a sweet, fun, athletic, and adorable 8-year-old girl. The goal was to create two distinct zones within the room: a cozy reading nook and a dedicated space for homework and creativity, while still weaving her personality throughout the rest of the design. I chose a soft palette of pink, green, and yellow, then added beadboard and chair rail trim to bring warmth and dimension to the space.
When selecting furniture and decor, I knew every piece needed to be functional for the layout of the room, but I also didn’t want to sacrifice charm. For the homework and creativity zone, I chose an adorable green desk with scalloped detailing and planned to hang a pegboard beside it to organize and display her crafting supplies and school essentials.
During my first walkthrough of the room, I noticed she had artwork, photographs, and posters pinned directly onto the walls. I immediately made a mental note to incorporate a place where she could continue doing that intentionally and creatively. That sparked the idea for a large push pin board above her desk. The only problem? I couldn’t find one that was both large enough for the space and visually interesting. Everything functional lacked personality, and everything cute was far too small.
So I decided to make one myself.
Step 1: Gather Materials & Tools
I originally saw another DIY creator use rigid foam insulation board to make a fabric-covered push pin board, and it looked simple enough to recreate — so that became my starting point.
Here’s everything I used:
Materials:
Large piece of rigid foam insulation board
1x2 Poplar Trim
Large beaded trim
#10 1” screws
Striped fabric
Sawtooth picture hangers
Construction adhesive
Hot glue sticks
Staples
Tools:
Hand saw
Heavy-duty staple gun
Glue gun
Pruning shears
Clamps
Sanding File
Step 2: Assemble the Board
I started by cutting the foam board down to the size I wanted using a hand saw, then wiped the surface clean with a rag to remove any dust or debris. Next, I laid the fabric face-down on a large flat surface and placed the foam board on top before trimming the fabric, making sure to leave several extra inches on all sides.
Once everything was positioned, I pulled the fabric tightly over one side of the board and stapled along the edge (top surface), then repeated the same process on the opposite side while keeping the tension as even as possible.
The corners took a little more finesse. I started by pulling the fabric tightly around the corner and stapling it directly along the edge of the foam board. Then, to reduce bulk and create a cleaner fold, I trimmed the excess fabric at an angle before folding the remaining fabric neatly over itself and securing it with another staple. This helped create a tighter, more polished corner without excess fabric bunching underneath.
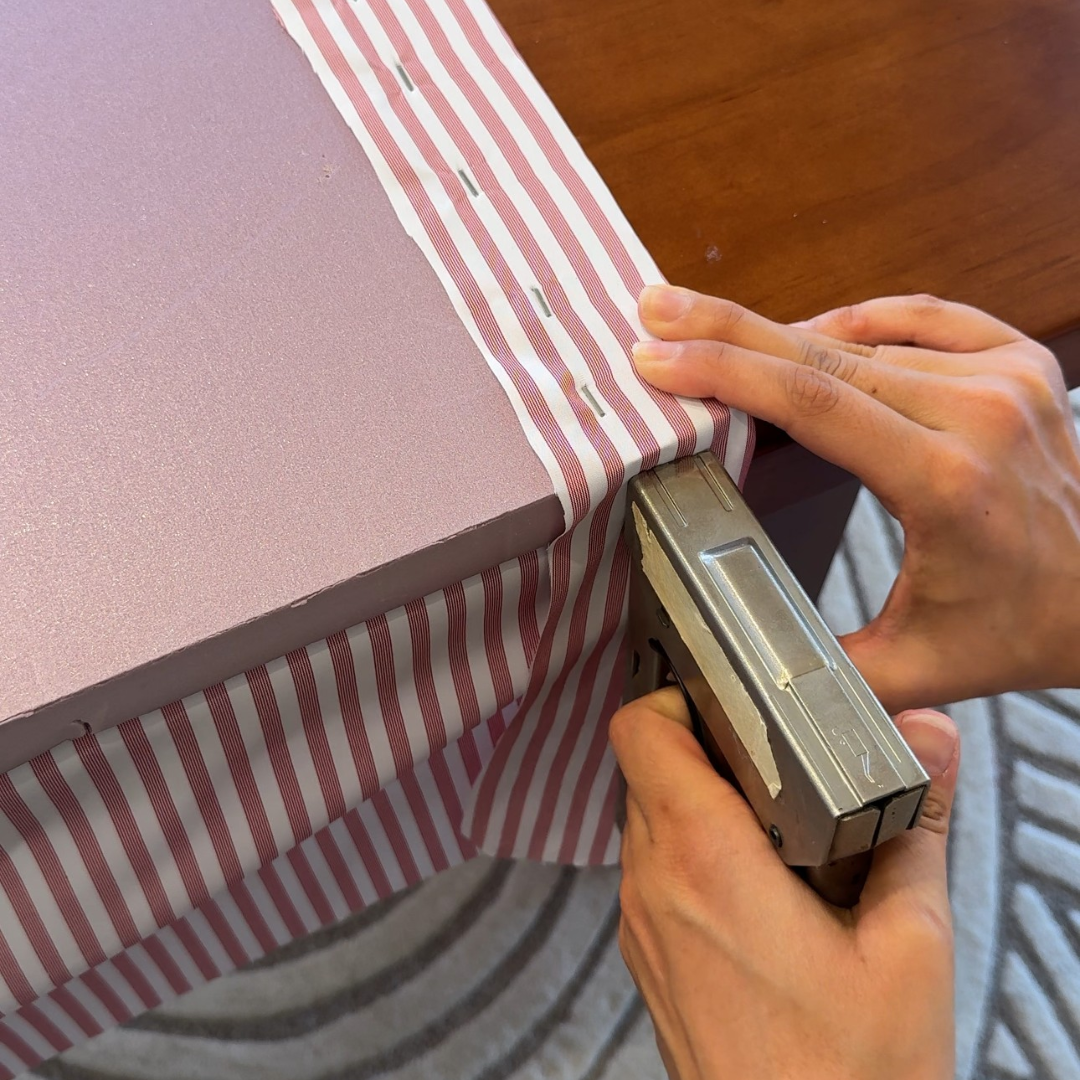
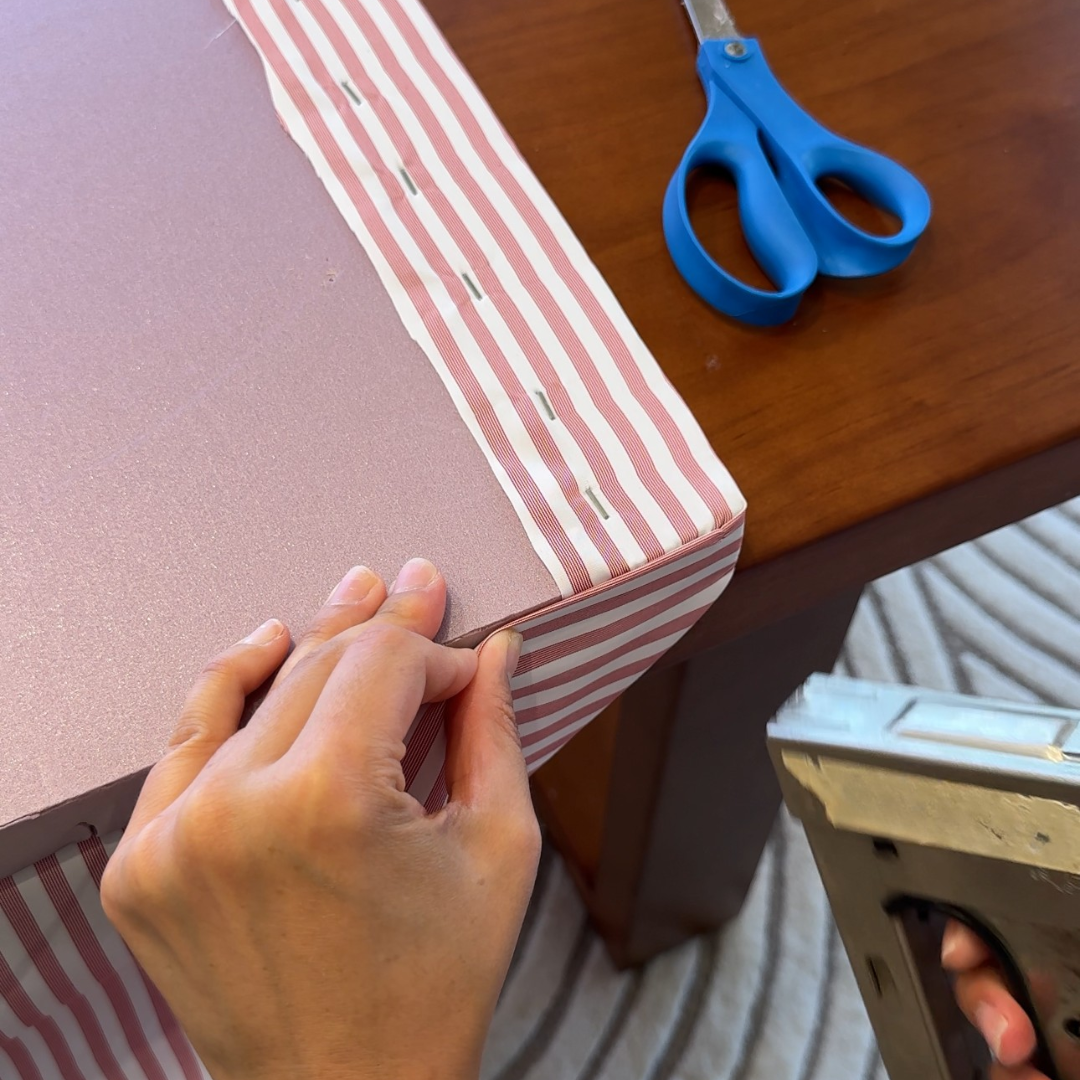
Once all four corners were tightly secured, I trimmed away any excess fabric around the staples. Then, for an added layer of security, I used my trusty cordless hot glue gun to glue the fabric directly to the foam board.
Step 3: Add the Trim
With the help of my live-in contractor, we cut the 1x2 poplar trim pieces down to size to frame the newly covered foam board. Using #10 1” screws, we connected two trim pieces at a 90-degree angle to create the first corner — Sean drilled while I held the boards steady. We repeated the process to create the second corner.
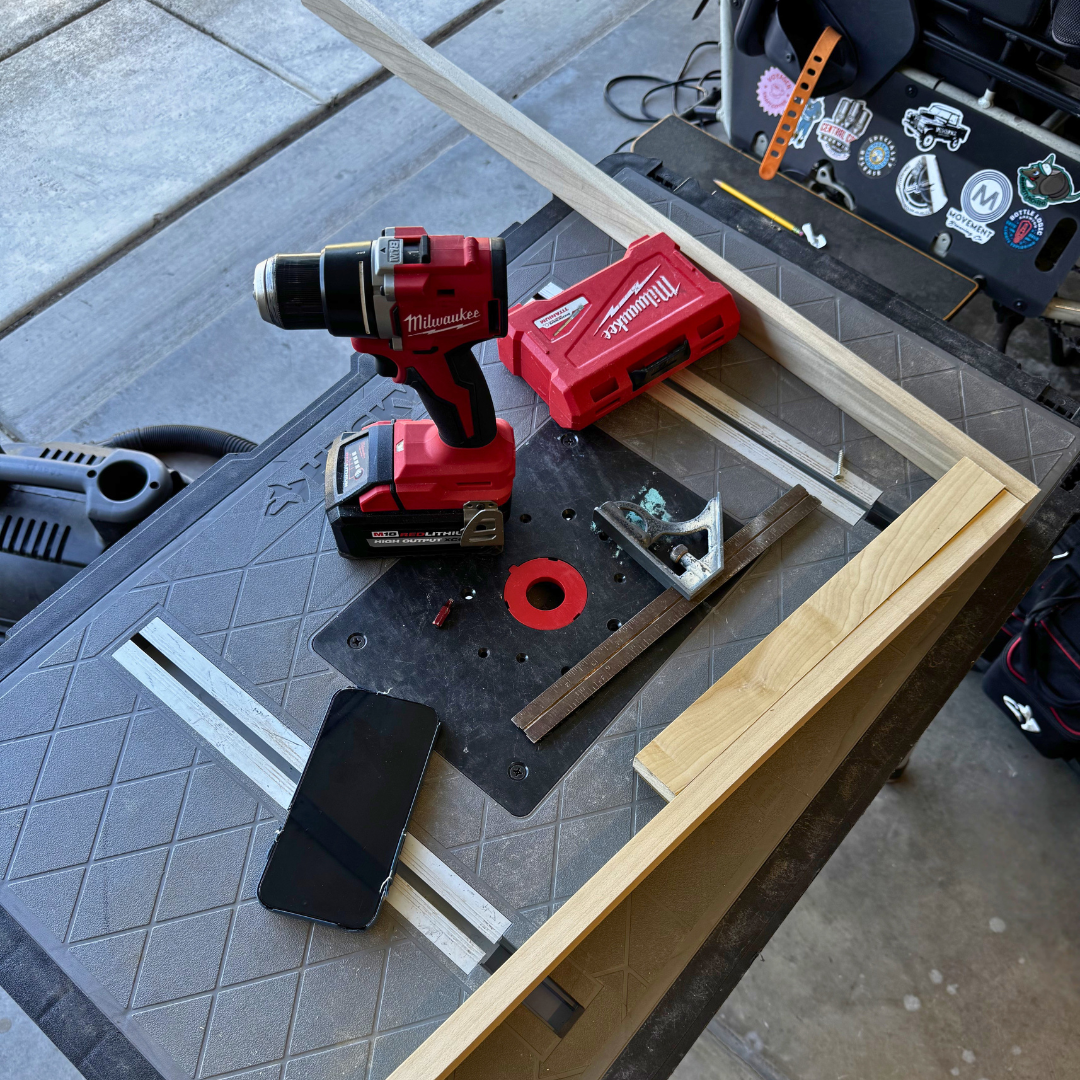
Next, we applied construction adhesive along the inside edge of the wood frame before carefully sliding the push pin board snugly into the three-sided frame. To help everything adhere tightly, we positioned the frame flat on the ground with the two vertical boards facing upward so I could apply pressure while the adhesive set.
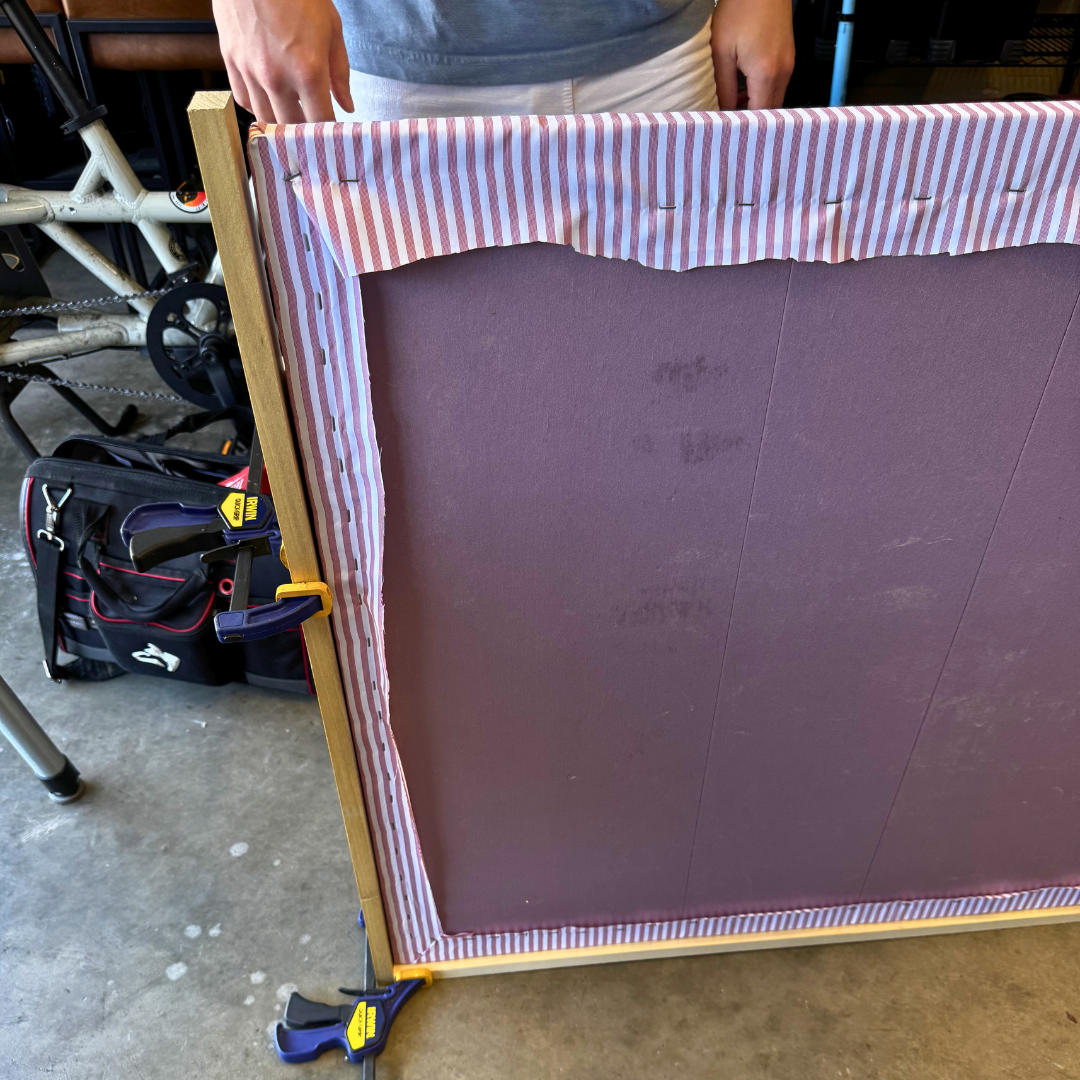
Once the board was secure, we attached the final trim piece using more construction adhesive and one #10 1” screw at each corner.
Step 4: Adding the Decorative Bead Trim
After admiring our handiwork, we laid the framed push pin board flat to prepare for the decorative bead trim.
We started by laying the bead trim along the wood frame to measure how much we needed. After marking the dimensions on the back of the trim, we used heavy-duty pruning shears to cut each piece to size. To create a cleaner, more polished finish, I used a sanding file to smooth any rough edges left behind by the shears.
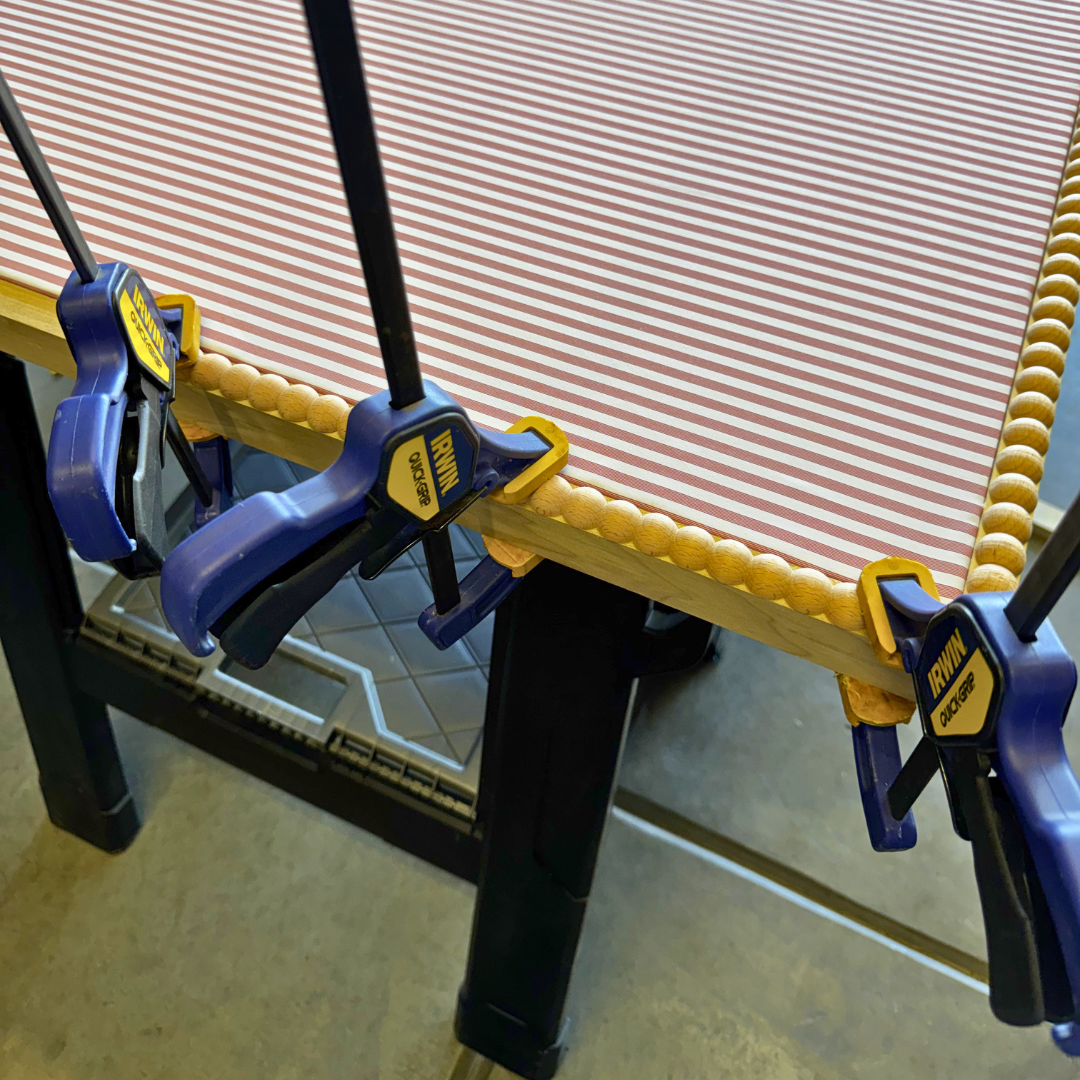
Next, we applied construction adhesive to the bead trim and secured it directly onto the wood frame. If you have clamps, I highly recommend using them here to help reinforce the connection while the adhesive dries — especially since the glue sets fairly quickly.
Step 5: Adding Hardware for Hanging
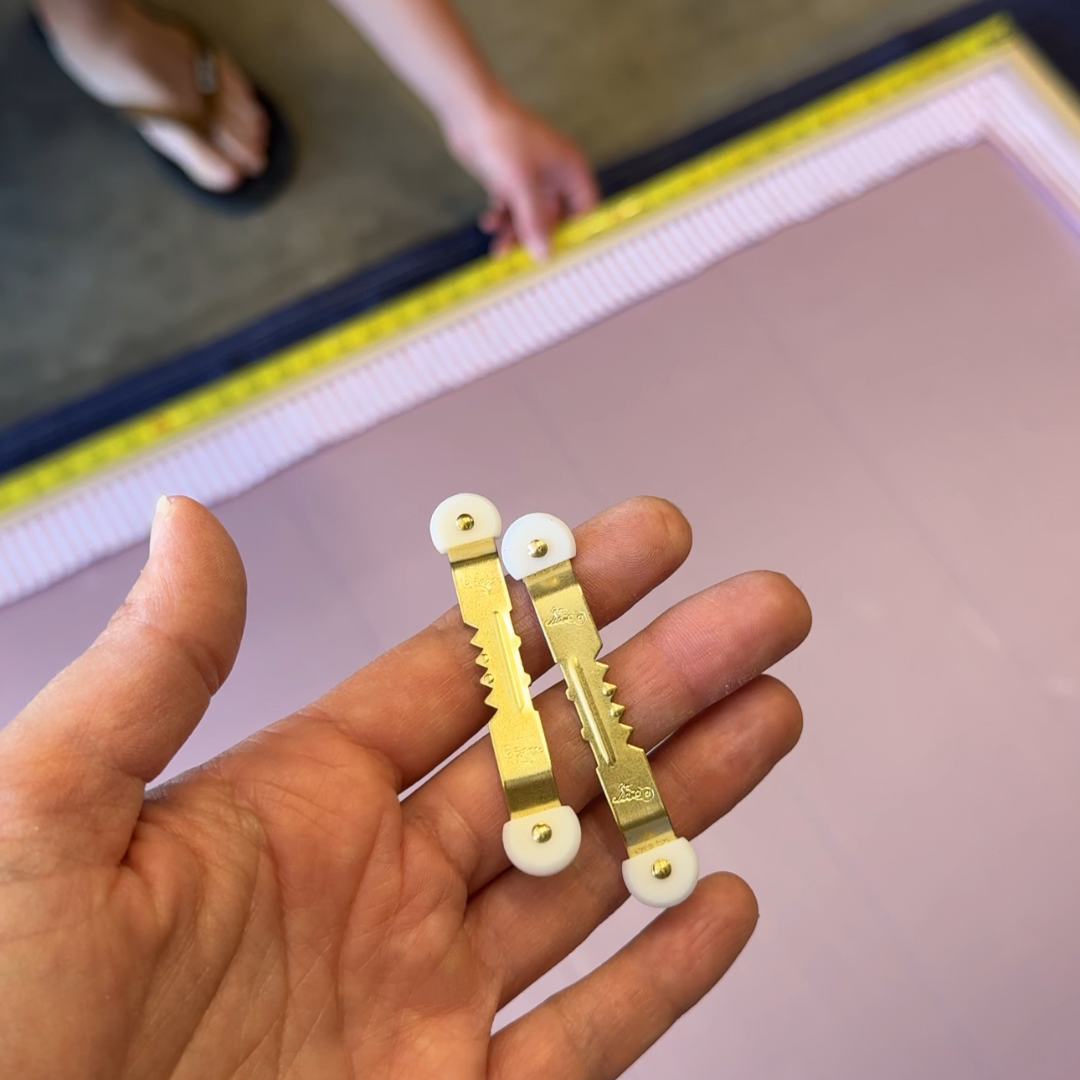
There are several ways you could hang this push pin board, but because it’s surprisingly lightweight, drywall anchors aren’t really necessary. I opted to use two sawtooth picture hangers attached evenly across the top trim piece for easy hanging.
Step 6: Adding Jewelry
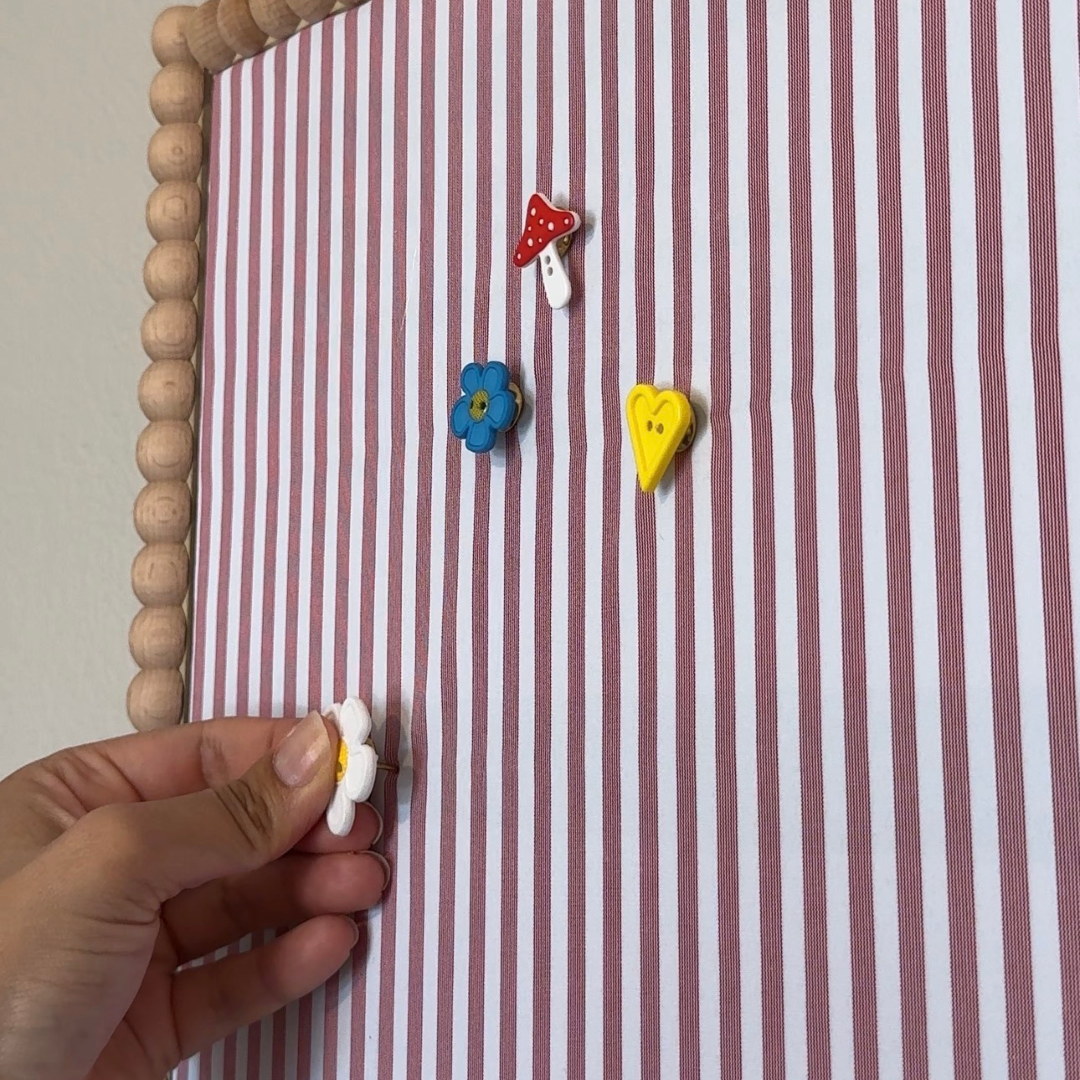
While this final step isn’t necessary, it does add a level of personality that I find especially charming. After all, why settle for basic push pins when you can create ones that reflect the personality and interests of the person using the space?
To make them, I simply used decorative buttons, hot glue, and standard push pins. I attached each button to the top of a push pin with a small amount of hot glue, creating one-of-a-kind accessories that made the board feel even more playful and personal.
And that’s it — a custom push pin board that’s equal parts functional and beautiful.
One of my favorite things about DIY projects like this is that they allow you to create something completely tailored to a space and the person living in it. Not only did this project solve a practical need in the room, but it also became another opportunity to layer in personality, creativity, and charm.
Honestly, I think those are the details that make a house feel special in the first place.
Everything I used for this project is linked below!