
We Needed a 10-foot table by Easter… so we (Sean) built one
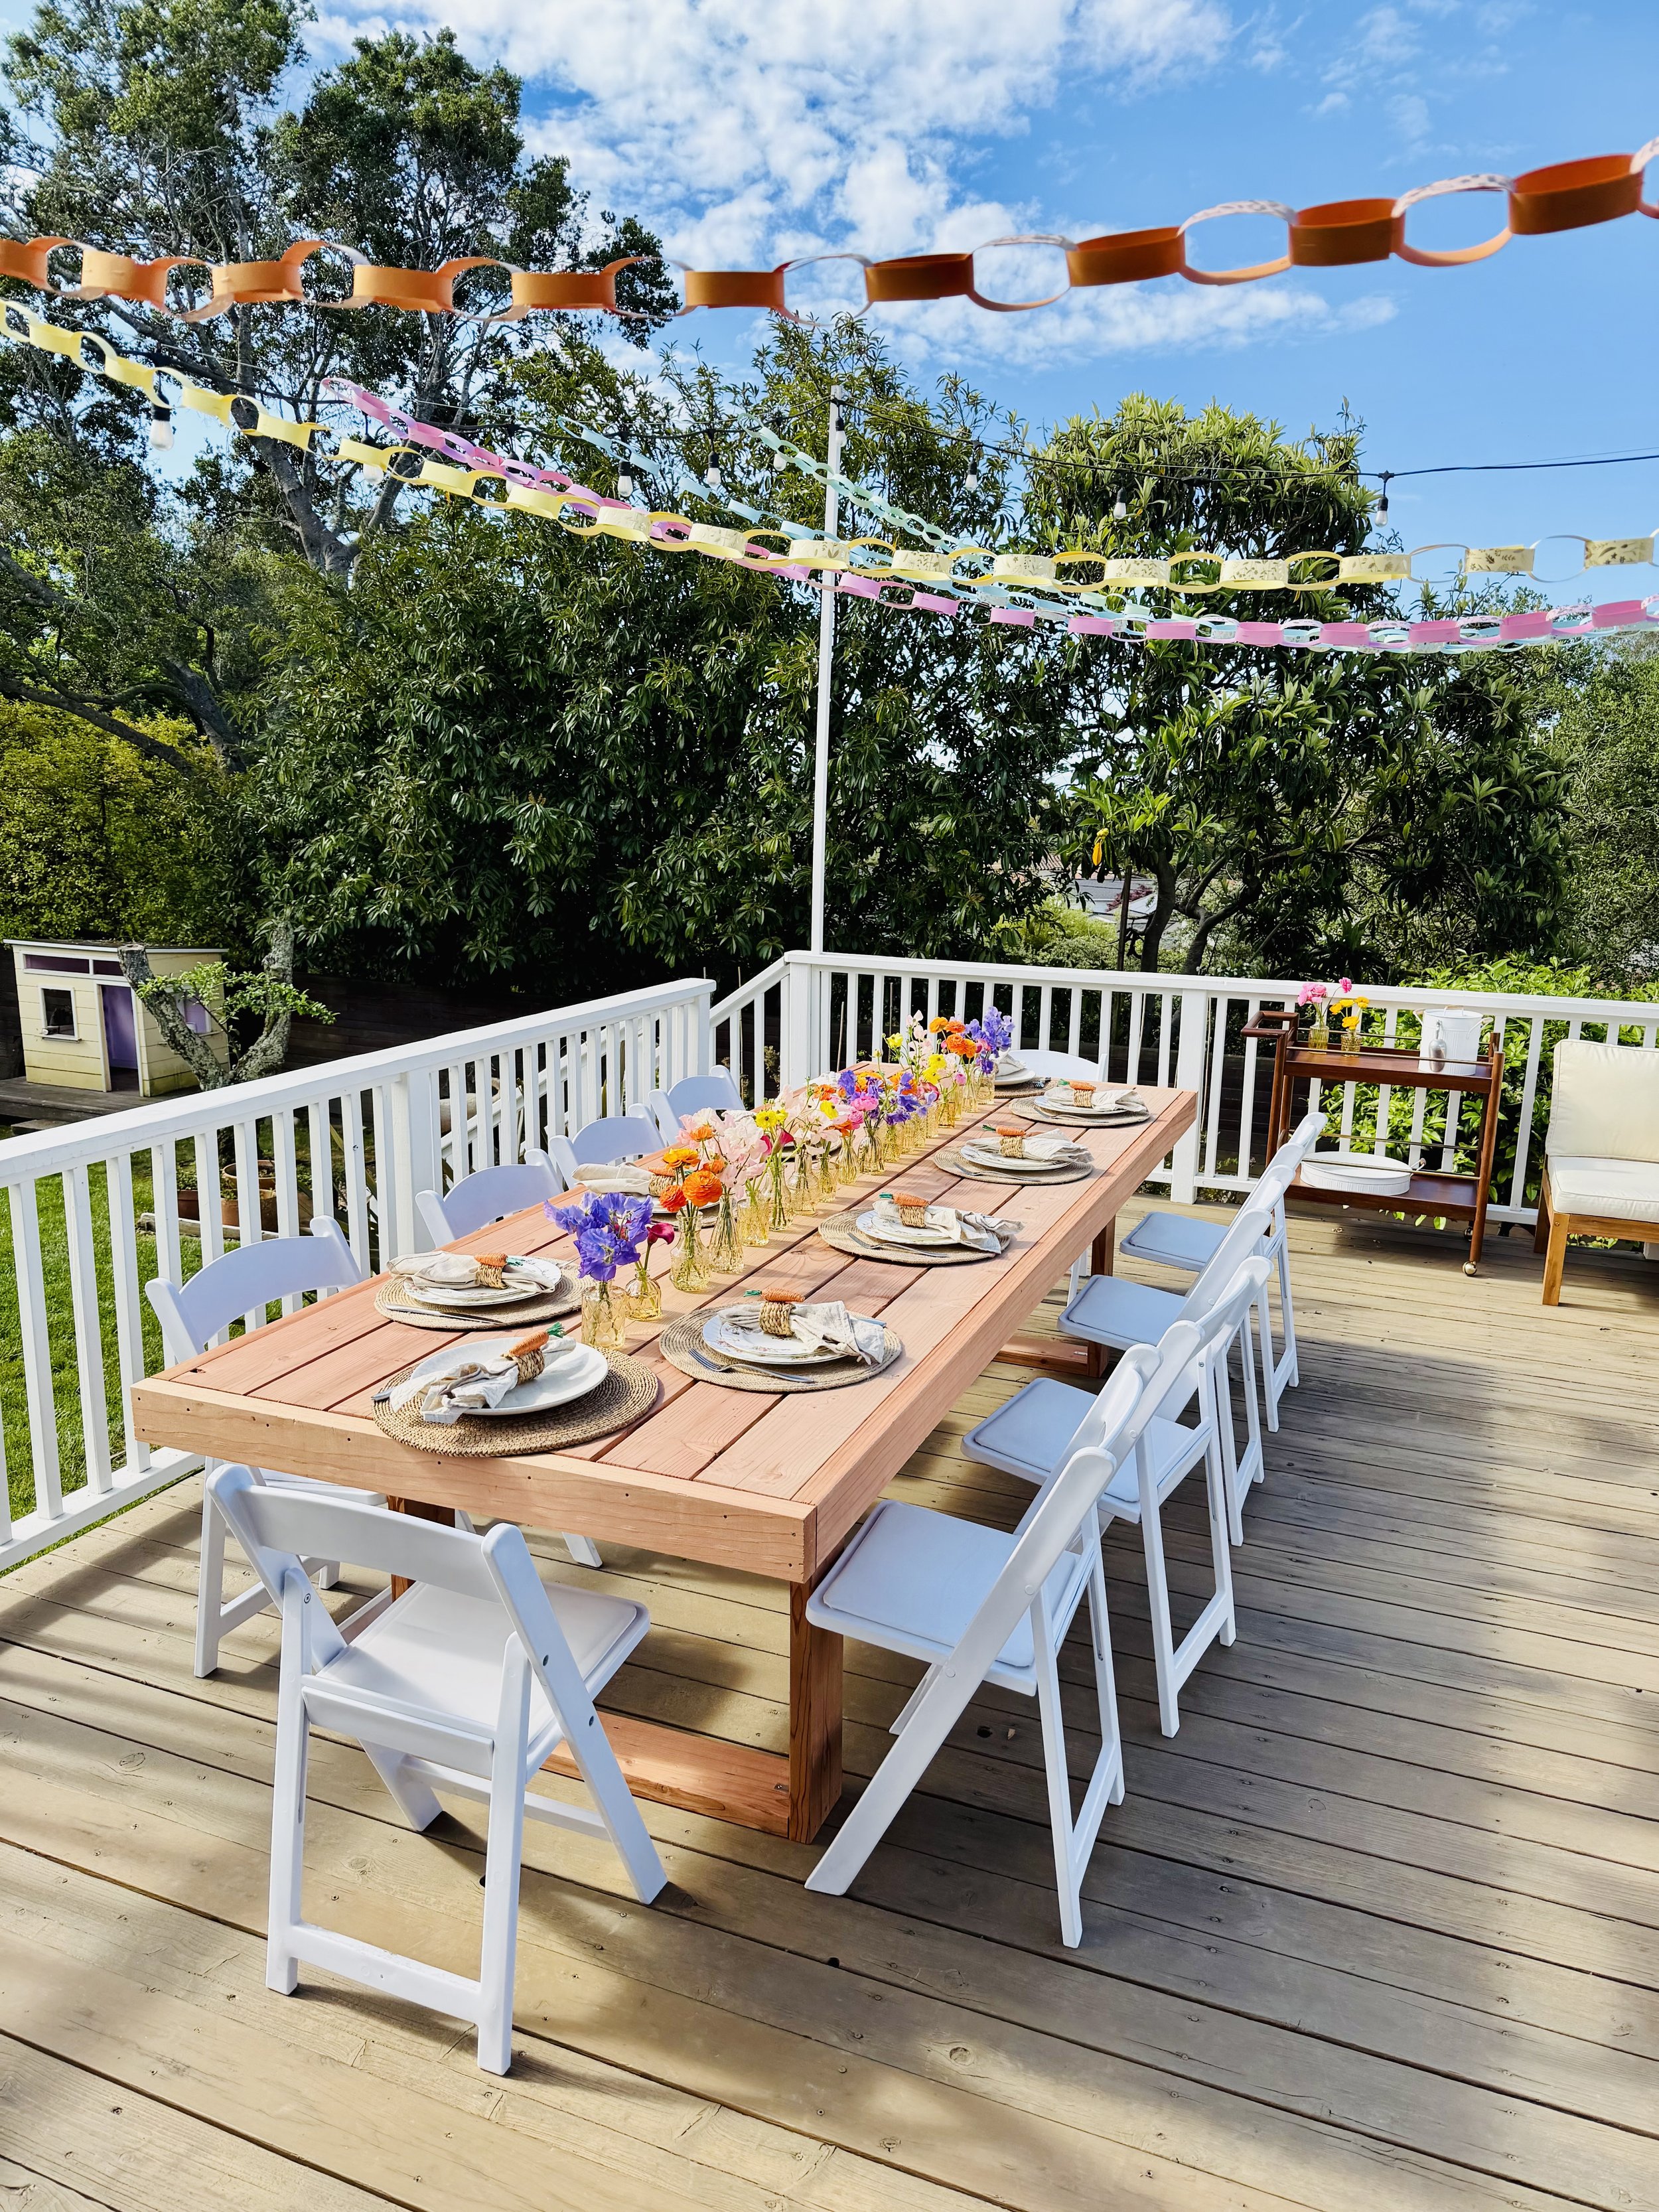
The time came to host Easter, and we had one of two options: put our DIY bench build to use and set up a few folding tables to host 10 adults and 7 kids… Or– Finally pull the trigger and buy outdoor furniture for the deck and take full advantage of the sunny forecast.
As I started browsing outdoor tables large enough to seat a crowd—Sean comes from a family of six and I come from a family of seven (not including significant others and kids)—we knew we needed something big. Realistically, at least 10 feet long to seat everyone comfortably.
What we weren’t ready for? The price tag that comes with a table that size.
So naturally, the conversation went like this:
Me: “Babe, do you think you could build an outdoor table?”
Him: “Ugh… yeah, I think so.”
Me: “Great. We need it before Sunday.”
And just like that… we had a plan.
The Starting Point
After browsing for inspiration across a few different platforms, we both gravitated towards a clean, minimalist design with square legs.
Of course, within hours, Instagram started serving us table builds left and right. While a lot of the designs were beautiful, many looked like they would block chairs from sliding in and out easily. We also wanted to make sure anyone sitting at the ends of the table would have plenty of legroom.
So functionality became just as important as aesthetics.
The Design Plan
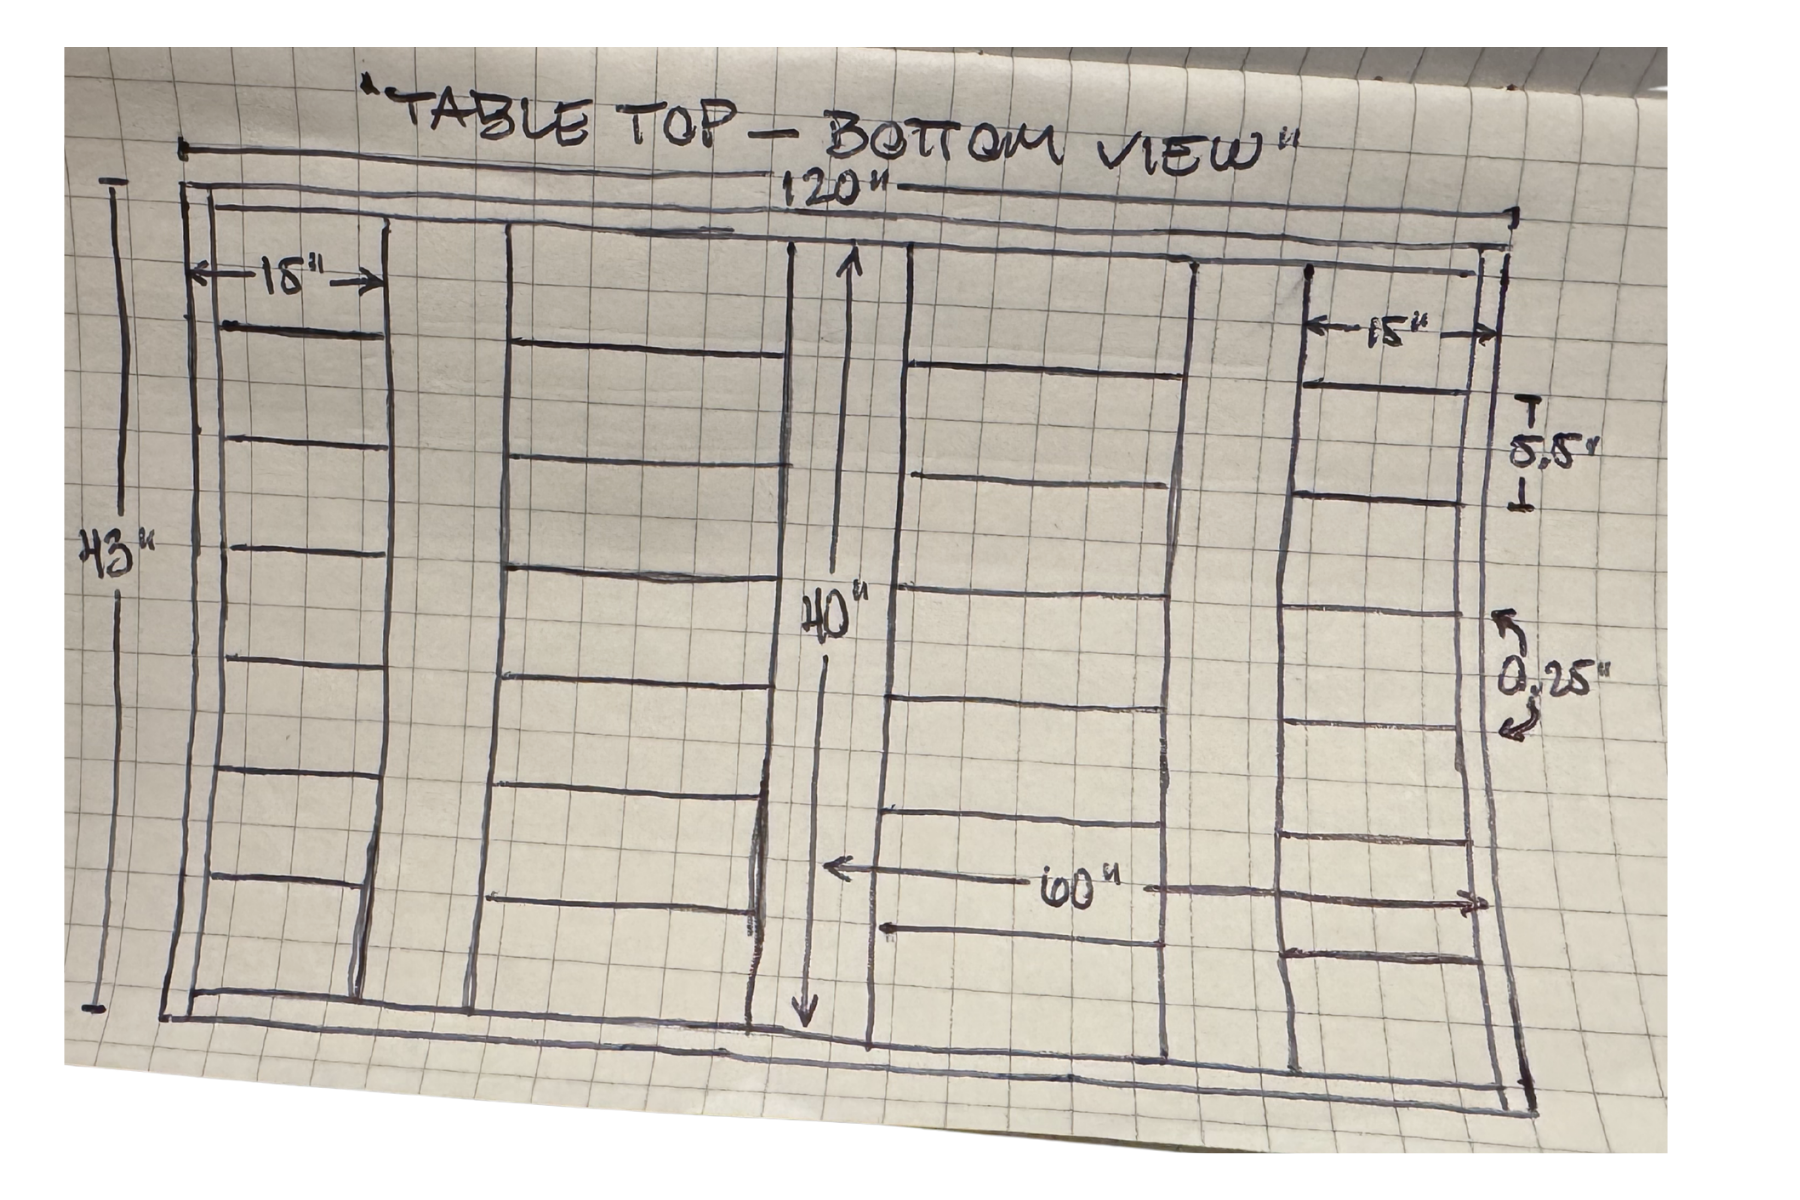
We knew from the start the table needed to be 10 feet long—but the width took a bit more thought.
I wanted enough space down the center for serving dishes, florals, and all the little details that make a table feel special—without crowding anyone’s place setting.
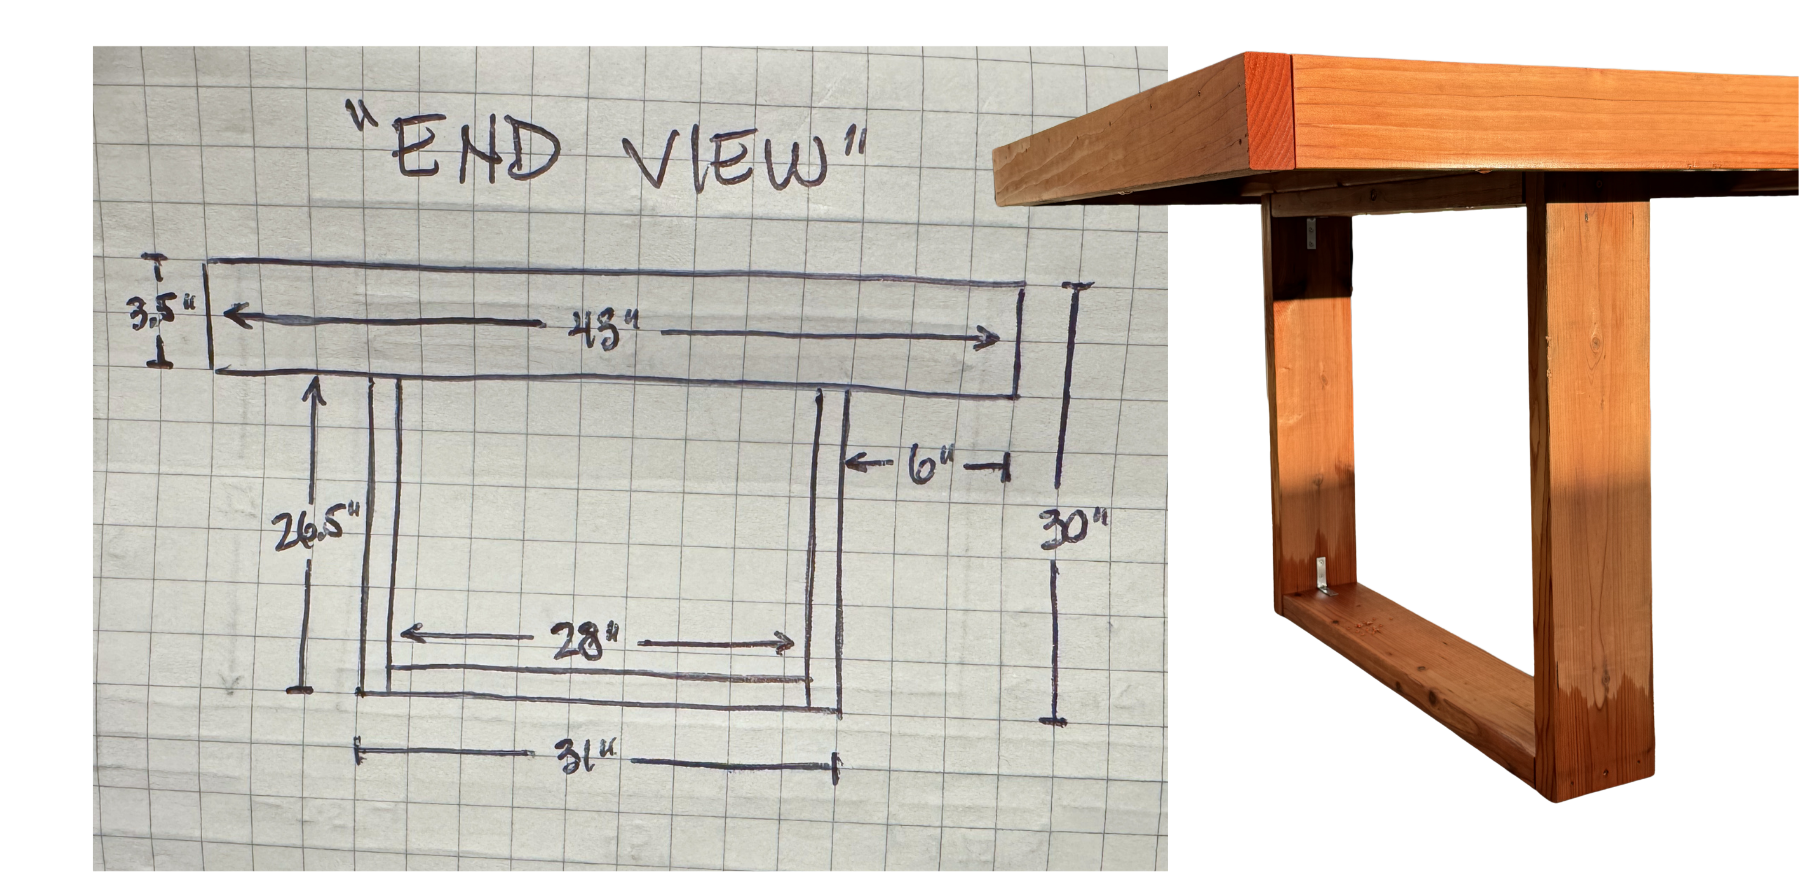
Sean also factored in about 6 inches of overhang from the edge of the table to the leg frame so guests could sit comfortably—even at the ends.
After measuring and mapping everything out, we landed on a width of about 4 feet.
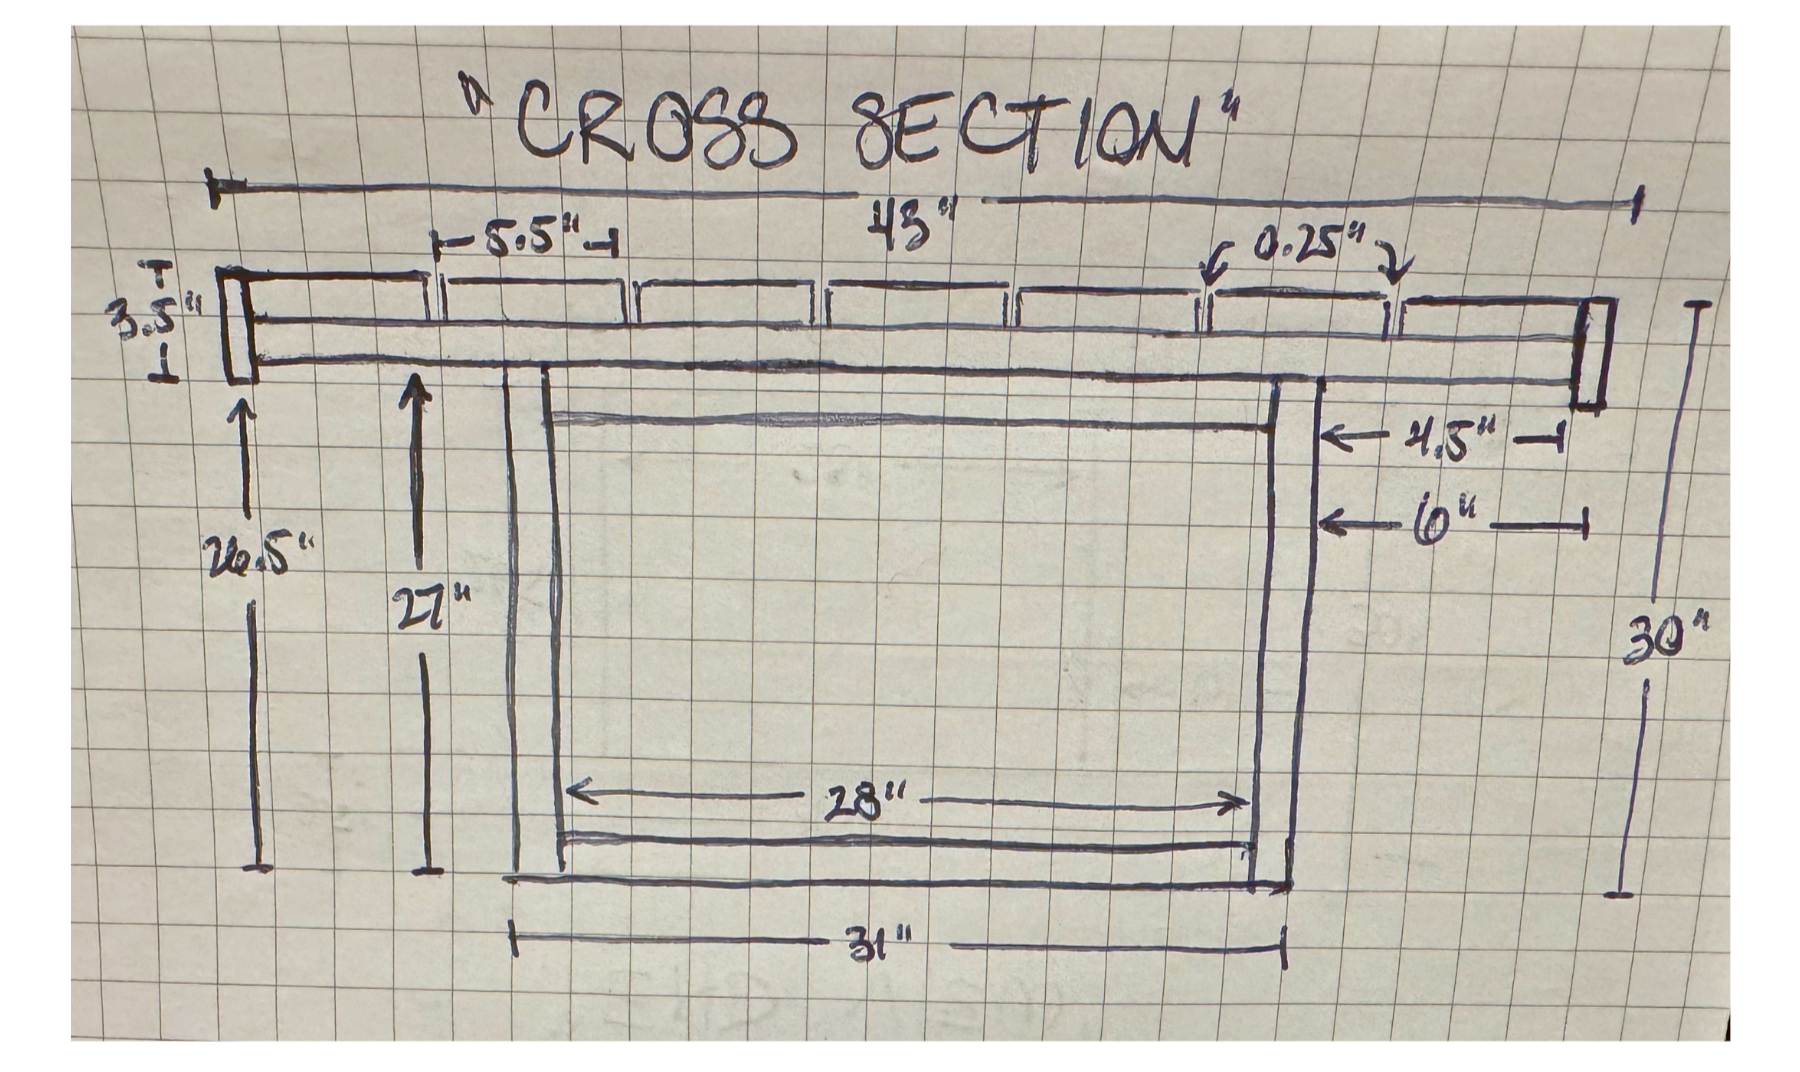
Originally, we considered using six 2x8 boards, which would have given us a width of about 45 inches (just shy of 4 feet). But that would have created a seam right down the middle of the table—not ideal for styling.
So instead, we pivoted to using seven 2x6 boards. This allowed for a true center plank, making it much easier to anchor vases, serving dishes, and décor.
We also built in a ¼-inch gap between each board to allow for natural wood expansion and contraction over time.
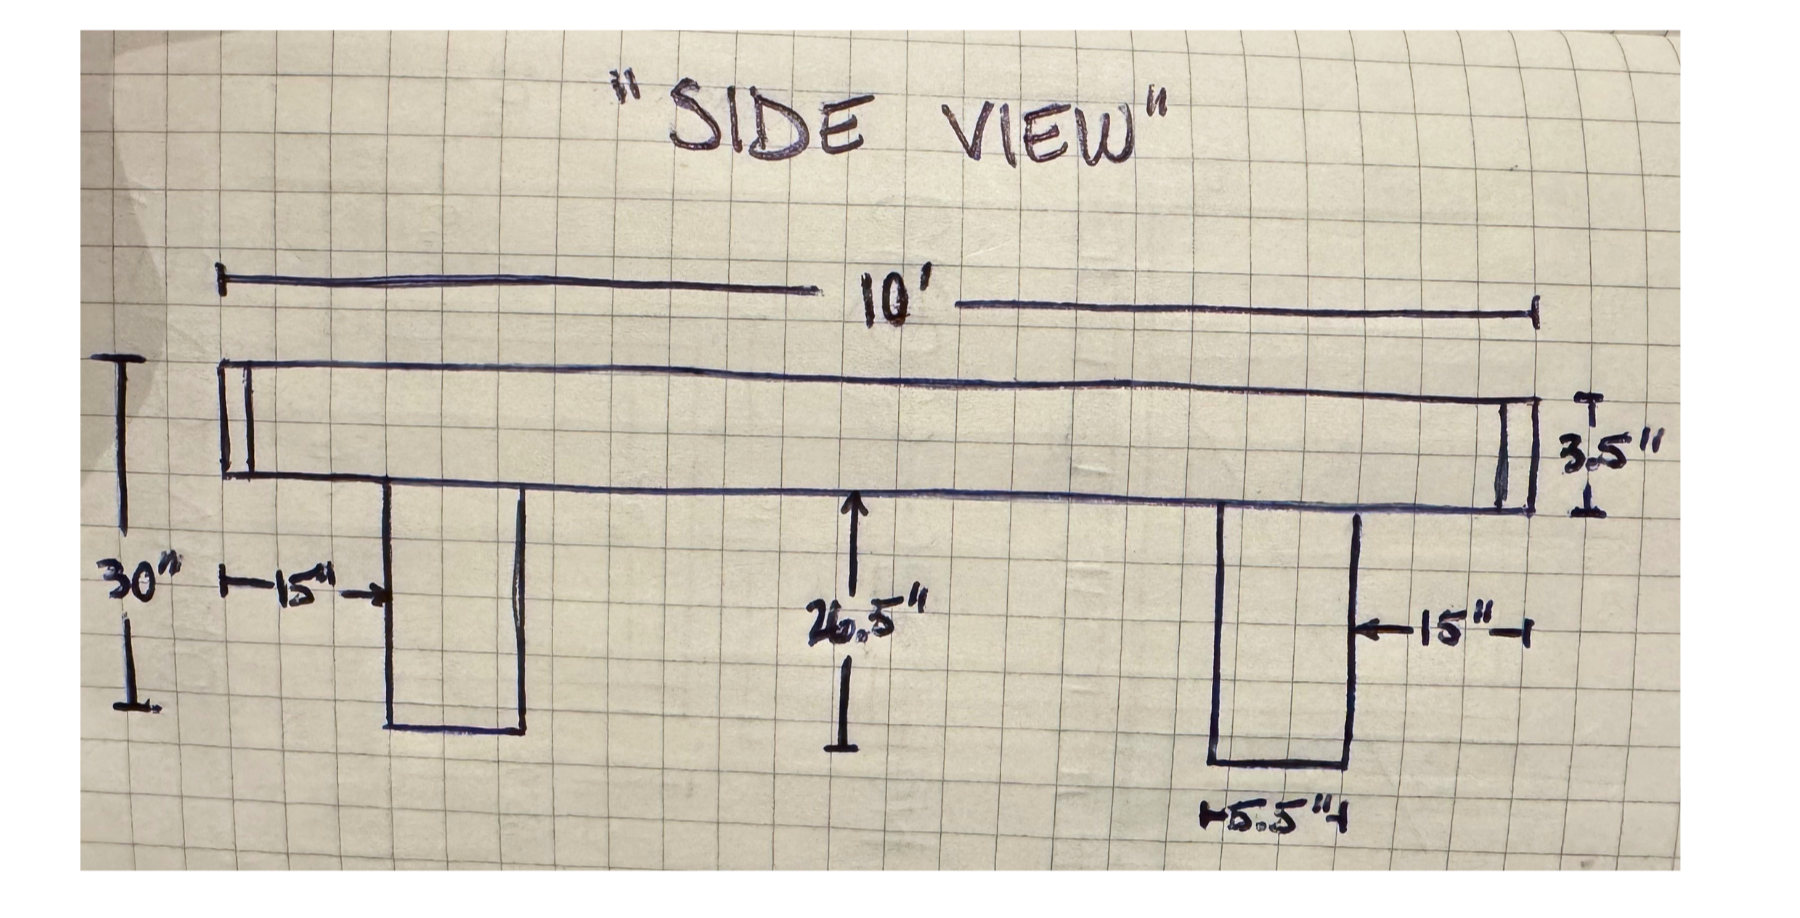
Height & Structure
Next up: height.
Sean referenced the dimensions of our indoor dining tables to land on something that would feel comfortable for everyone—especially our taller family members (meanwhile, at 5’2”, I’ve accepted that I’ll always need a pillow 😅).
We landed on:
30” total table height
26.5” clearance from the ground to the bottom of the trim
To give the table a more finished look, we added a trim piece around the edges to enclose the cut ends of the 2x6 boards.
Table Dimensions
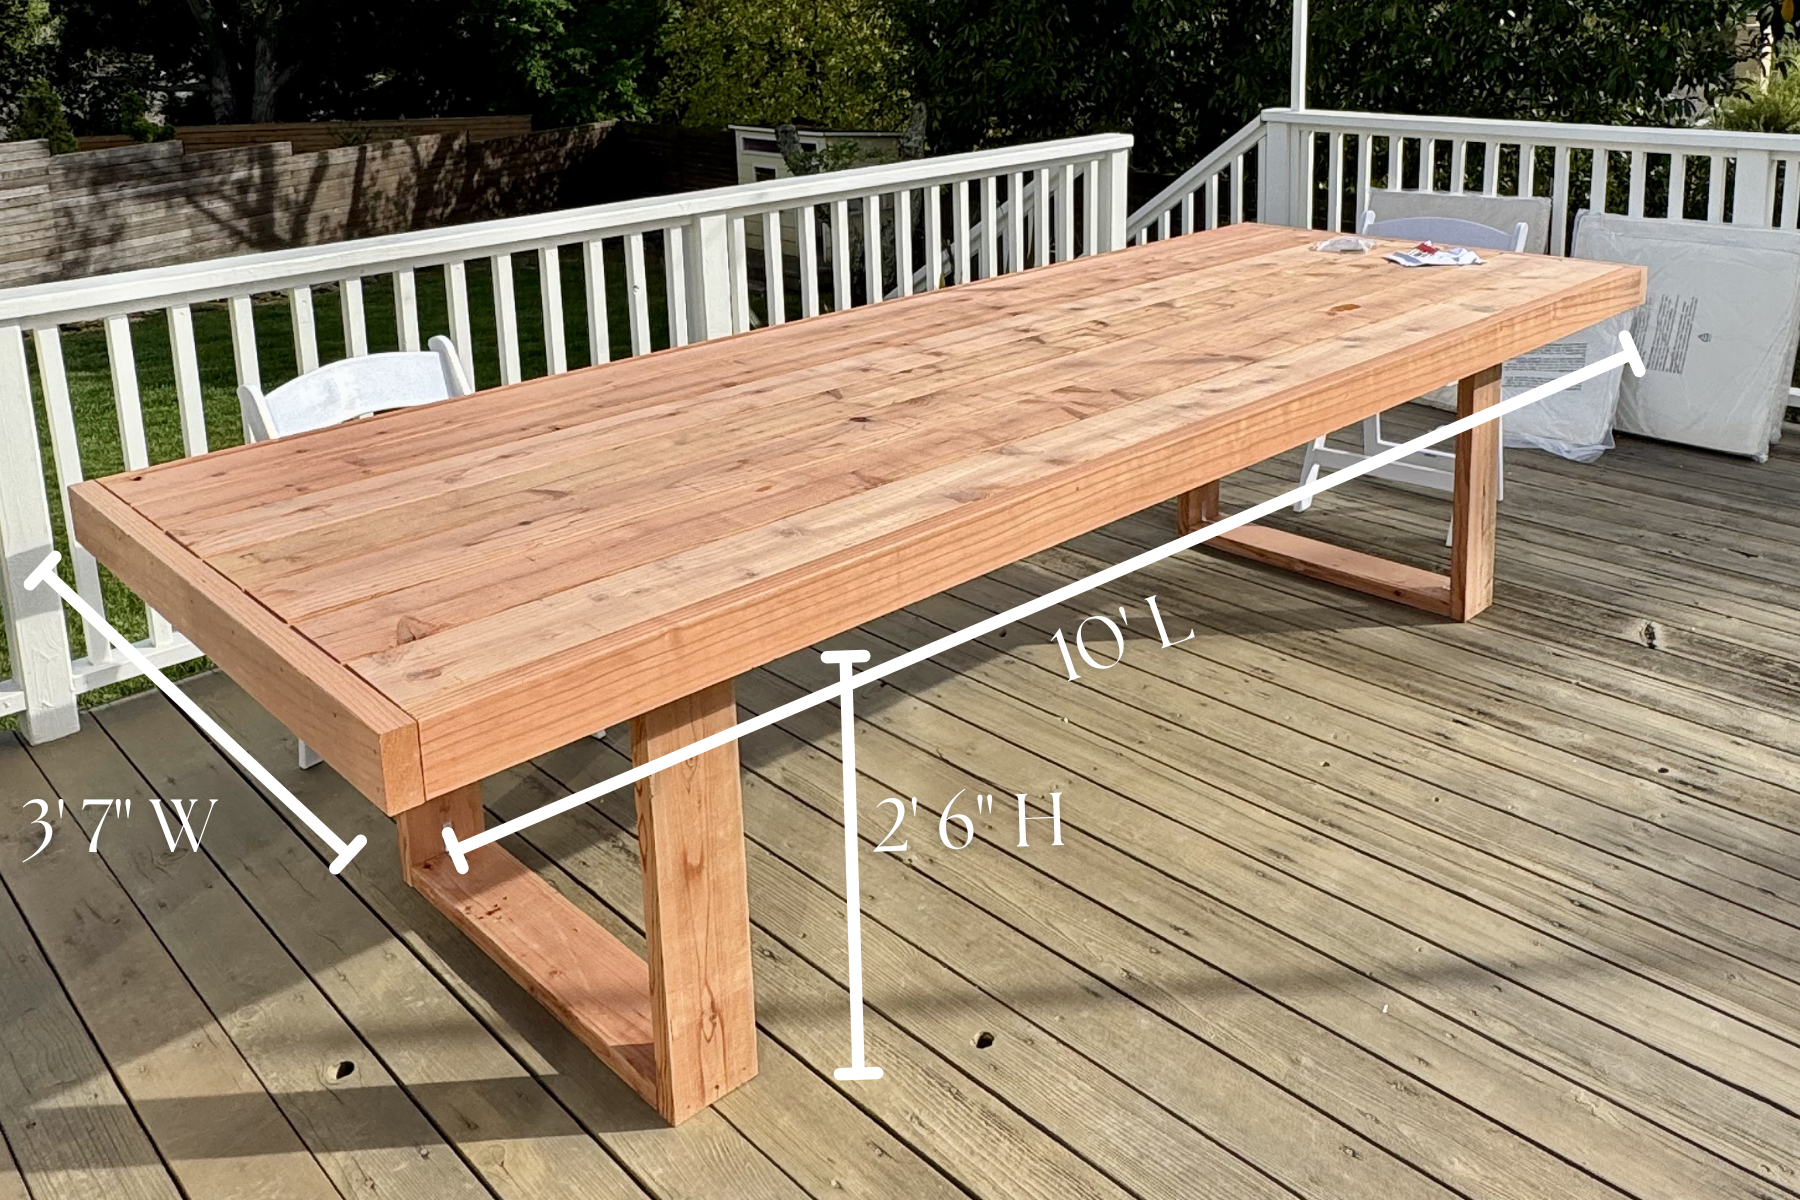
10’ L x 3’ 7” W x 2’ 6” H
Materials
Once the design was finalized, Sean calculated everything we needed for the build:
10 × 10’ 2x6 boards
3 × 10’ 2x4 boards
8 elbow brackets (2” — we already had these from our bench build)
2” #8 finishing screws (for the tabletop and leg frames)
3” exterior wood screws (to reinforce the legs and secure them to the tabletop)
If you’re local to Oakland, we highly recommend checking out Economy Lumber. The staff is incredibly helpful—especially if you’re newer to building (like me)—and they have a great selection of materials.
Sean chose Redwood for its availability, color, and durability for outdoor use.
Build Prep
To kick things off, Sean made all the necessary cuts using a portable table saw.
If you saw the viral reel, you may have noticed we do not have a proper workbench… Sean jerry-rigged one using storage bins left over from our cross-country move. 🤣
We may not be professionals, but we are 100% resourceful.
For the leg frames, Sean cut:
One 10’ 2x6 into four 27” pieces
One 10’ 2x6 into four 28” pieces
For the tabletop, Sean cut:
One 10’ 2x6 into three 40” pieces
Seven 10’ 2x6 boards into seven 117” pieces
For the tabletop trim, Sean cut:
One 10’ 2x4 into two 43” pieces
Two 10’ 2x4 boards into two 117” pieces
Build Process
Step 1: Building the Leg Frames
The biggest challenge here was figuring out how to create and hold a perfect right angle while drilling.
Sean first tried standing the pieces upright and balancing the top piece across—but it was way too unsteady.
So instead, he laid everything on its side, used a right angle tool to line things up, held it tightly, hoped for the best… and drilled.
(And if you’re wondering where I was during all of this—I was with my adorable nephews, thank you very much. Please direct all complaints elsewhere. 🤍)
Once the leg frames (or “boxes”) were assembled, he reinforced each corner with 2” elbow brackets.
Step 2: Creating the Tabletop

To start, Sean secured one of the 117” 2x4 trim pieces to one of the 117” 2x6 boards to create the first edge of the table.
Next, he attached the two 43” trim pieces to each end—creating a frame to anchor the rest of the build.
After several minutes of contemplation—
“Should I add the support pieces now?”
“Do I wait until the end?”
“And also… how did she get me to do this?”
—Sean decided to install them early.
Using 2” #8 finishing screws, he secured three 40” 2x6 boards perpendicular to the frame. This helped lock in spacing and avoided visible screws from the ends.
One support piece was placed at the center
Two were placed 18” from each end
These also serve as anchor points for the leg frames.
Next, using ¼” spacers, Sean slid each 117” board into place—repeating the process until all seven boards were installed.
Because he was building solo and working flat on the deck, he had to carefully slide each board under the support pieces at every intersection.
He built the entire table upside down to keep the top surface clean—no visible screws.
Finally, he secured the last 117” 2x4 trim piece to complete the frame.
Step 3: Attaching the Legs
Sean positioned each leg frame on top of the outer support pieces, making sure they were centered—this created a 6” overhang on each side.
He then secured each leg frame using 3” exterior wood screws:
2 screws on each end
2 screws in the middle
Finishing Touches (Still To-Do)
While the build is complete, we still have a few finishing steps:
Treat the Redwood sap - Sean plans to scrape off excess sap, apply heat to crystallize any remaining sap, and then use a solvent to remove residue. (If you’ve done this before—please send tips our way!)
Light sanding - to smooth out the tabletop.
Stain - I chose a walnut shade 🤎
Seal - A multipurpose sealant for water resistance and durability outdoors.
What We’d Do Differently
Leg frames - Sean would have used scrap wood to create a jig—something to hold the pieces in a perfect right angle and provide resistance while drilling. It would’ve made the process faster and more precise.
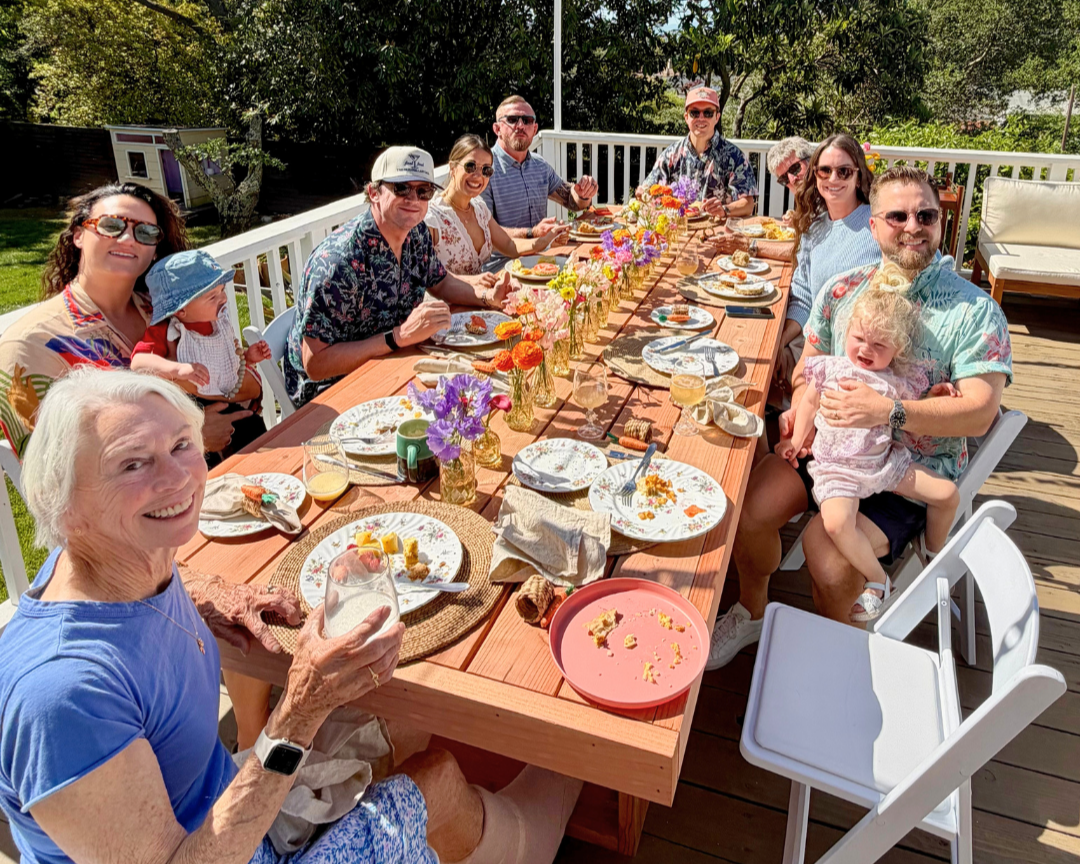
Turns out, the best part of this table isn’t how it looks—it’s what happens around it. The meals, the memories, the moments that stretch a little longer than planned. A good reminder that you don’t need a perfectly curated space to host something meaningful… just a table, a little intention, and people you love showing up.